
I know that it's bad to leave your tiller out in the weather, but I just don't have the cash flow to buy a cover from West Marine. Luckily my girlfriend Desirae is the most incredible woman ever and bought me a book called "The Sailmaker's Apprentice" for Valentine's Day. This is an absolutely awesome book. I think I've learned more about rigs and what the sails are supposed to do and how they're supposed to act by reading this book than I could ever hope to without sailing for 10 years straight (They say it takes 10 years of doing something to become an expert. Not the book, but the proverbial "they.") So, great book and the first chapter is how to make your own ditty bag! But I don't have all f the necessary supplies to make the bag... rats. Sooooo what do I do? Use the stitches in that chapter to make a tiller cover from an old dodger that came with my boat , but does not fit my boat. The dodger was pretty well destroyed anyway. I've seen quite a few of these wind up in the trash at the marina, but always held onto the one that came with my boat for just such a project as this! Now that I know it works, I may need to keep my scrounging eyes open for more garbage gold from other people!
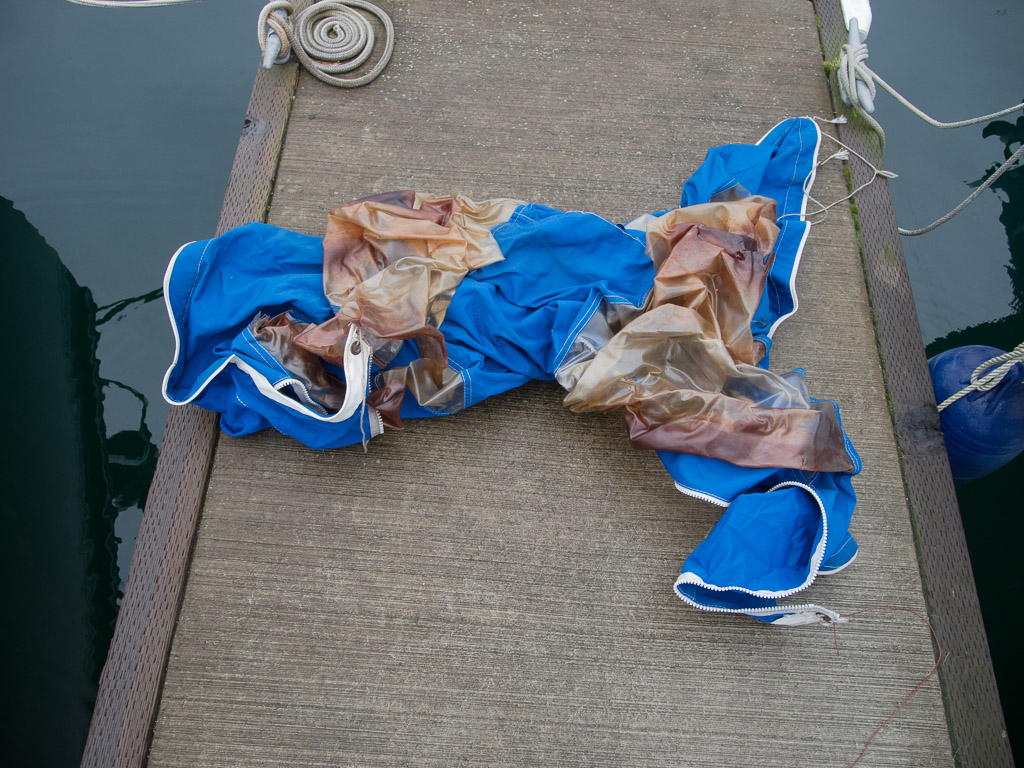
This is the top that the project began with.
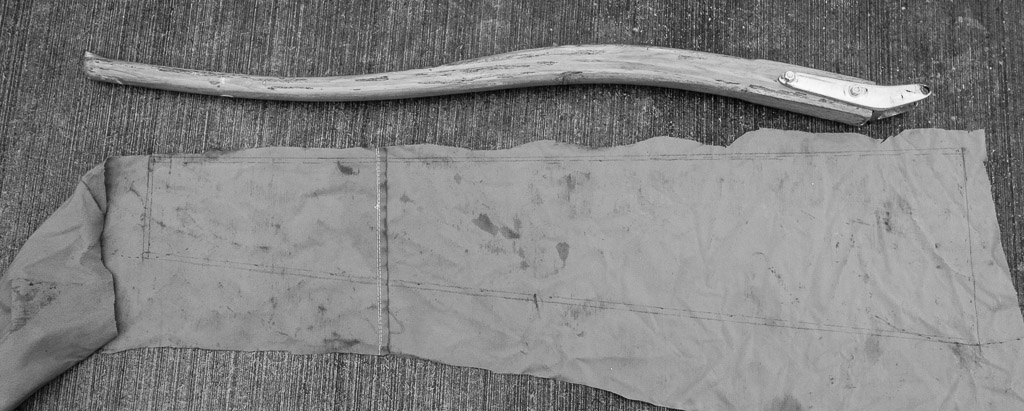
The First step was to remove the tiller so that I could use it for measurement. You can see that it's turning brown in places. Now that I have a cover, I suppose I'll have to varnish it this spring!!
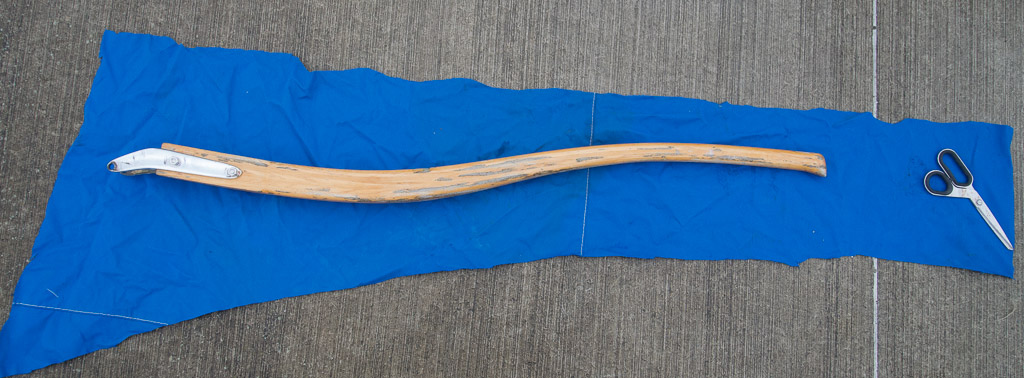
I initially hoped that maybe I could just trace it, but got to thinking about it and thought better of that. I measured the length and the circumference at both ends of the tiller. I then used these measurements to mark out for a straight bag with 1/4" seam allowances. I made it straight to keep things simple and assuming (correctly for once!) that the finished cover would just snake over the s-curve in the tiller.
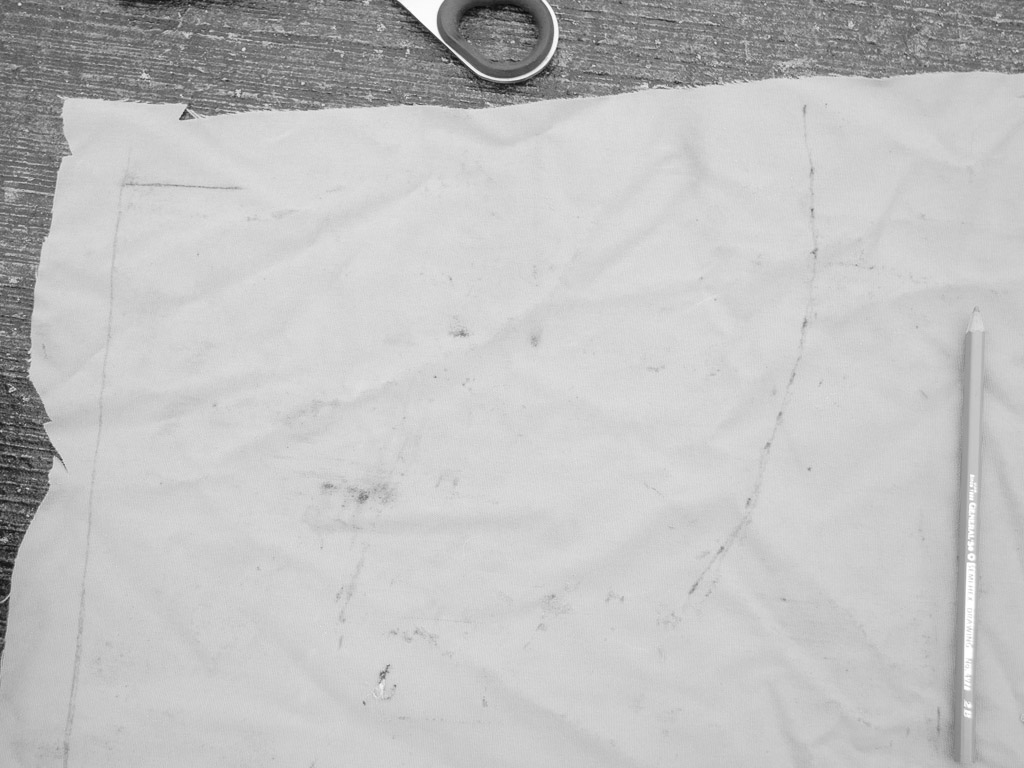
So I needed it to be 45" long, 11" on one side and Once I marked the length for one side on the Sunbrella fabric, I then measured the distance needed for to wrap around each end and marked that in an arc radiating from the corner of the first measured edge. With these arcs drawn, there was only one place where I could connect the two with my 45" line that I needed to match the other side. Tricky of me eh? All done without getting into any crazy math stuffs. A couple of these photos are in black and white because I'm hoping that will show the pencil better.
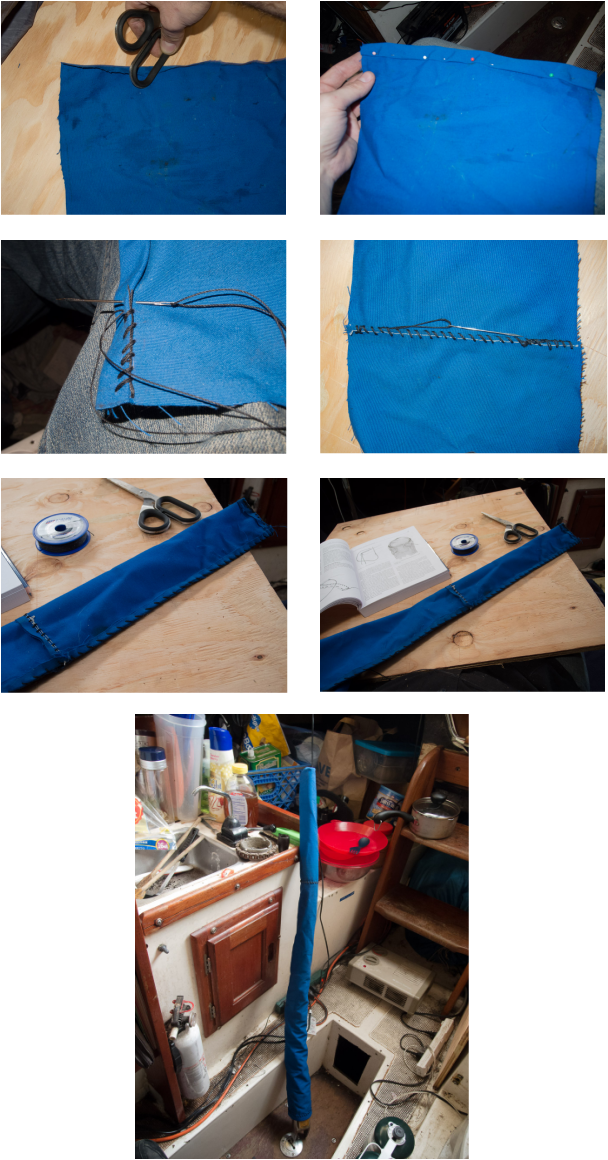
Then it was time to put it all together! I tabled the design at the end that would remain open to keep the Sunbrella from unraveling and give it a nice finished edge. You can see that there is also a seem that was in the dodger before I cut it down. I reinforced this with a flat stitch and am confident that it will hold up just fine. I used a pair of scissors to press the hems so that they stayed sort of folded over and I pinned the tabled edge, but didn't bother with the other sides. I used a round stitch around the edge and then turned it right-side out and it was done! Looks pretty danged good!
 RSS Feed